A small crashcourse on SlideLizard CREATOR to understand the basic functions.
Once you have installed SlideLizard CREATOR, a new tab will appear on the far right. If you click on it you will get to the functions of SlideLizard CREATOR.
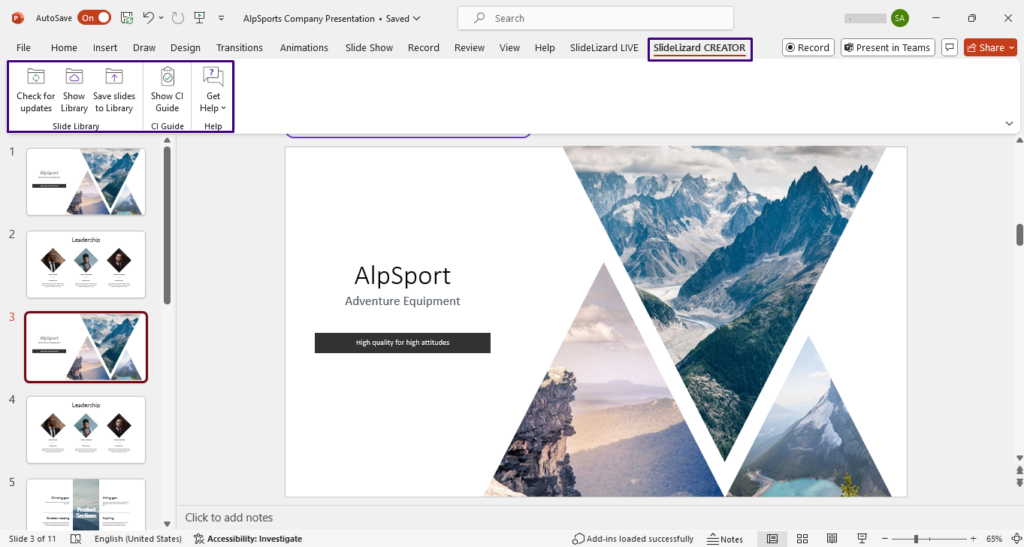
Content
- Explaination of the icons
- Show Library
Clicking on this icon will take you to the main menu. If you have never used SlideLizard Creator before or if you logged out last time, you will be asked to log in. More about this at “Login”. - Check for updates
This option allows you to check for updates of slides so that you are always up to date. - Save slides to Library
This option allows you to synchronize your slides with SlideLizard.
- Show Library
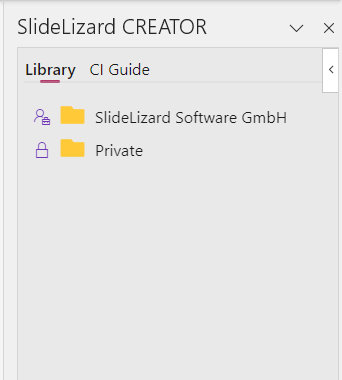
1. Show Library
Open PowerPoint and click on the “Slidelizard CREATOR” tab. Now go to the first icon on the top right called “Show Library”.
You will now see an overview with all your shared folders containing the slides and a private section.
You can get to your desired area by clicking on it.
Change the arrangement
You are able to change the arrangement by hovering over a folder or a slide and holding down the left mouse button. You will see a preview of the future location of the file or folder marked by a purple bar.
Changes and options
Right-click on a folder to make further changes.
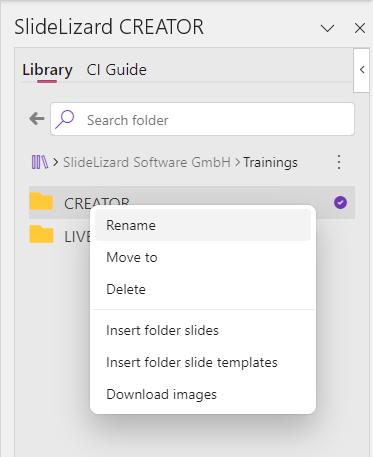
- Rename
Here you change the name of the folder. - Move to
Move the folder somewhere else. - Delete
Delete the folder. - Insert folder slides
All slides of the folder are getting inserted.
Right-clicking on a white blank area within the SlideLizard CREATOR field shows you more general options.

- Refresh
Update the folders in case another member has changed something and it has not shown yet. - New folder
Create a new folder. - Sync selected Powerpoint slides
Select the slides you want to share in SlideLizard CREATOR. Read more here: “Save slides to library”.
Almost the same functions are available when you click on the three vertical dots, but the options are expanded.

- Preview size
Change the view to the optimal size for you. - Status filter
A global filter that allows you to show and hide status variants. More about this at “Status. - Refresh
Update the folders in case another member has changed something and it has not shown yet. - New folder
Create a new folder. - Logout
Log out of your account. You will now need to log in again.
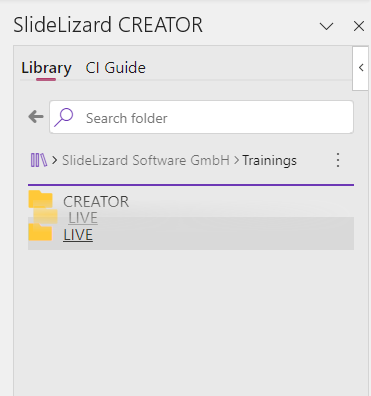
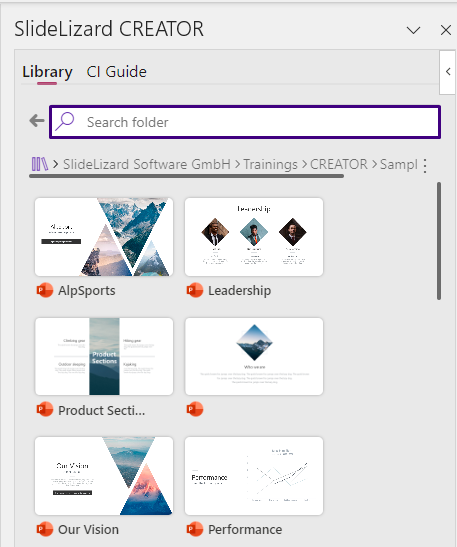
With a left click on the desired folder you will get into it. Here you can see all your synchronized slides.
When you move the mouse over a slide, you can easily insert it into your presentation by clicking “Insert”.
With a right click on a slide you have again different options.
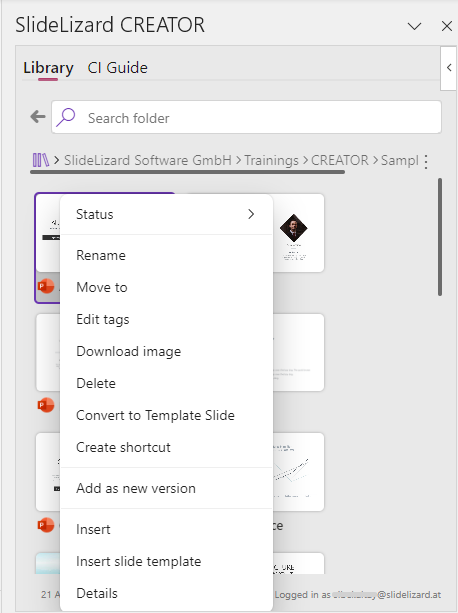
- Status
Change the status of a slide. - Rename
Rename a slide. - Move to
Move a slide to a different location. - Edit tags
Edit the tags of this slide. - Delete
Delete this slide in SlideLizard CREATOR. - Insert
Insert a slide into the current presentation. - Details
A version history that provides information about the changes, showing who changed something and when it happened.
Search bar
The search bar is located at the very top. Here you can search for folder names, slide titles and slide contents.
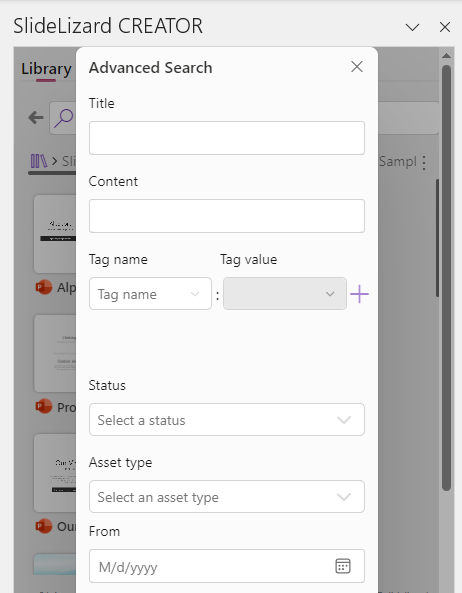
If you click on the small filter icon on the right side of the search field, you will get to the advanced search where you can also filter by status or tags.
2. Check for Updates
With this option you can make sure if there is any update for your slides.
If a slide has changed, the following options are available for you to choose from:
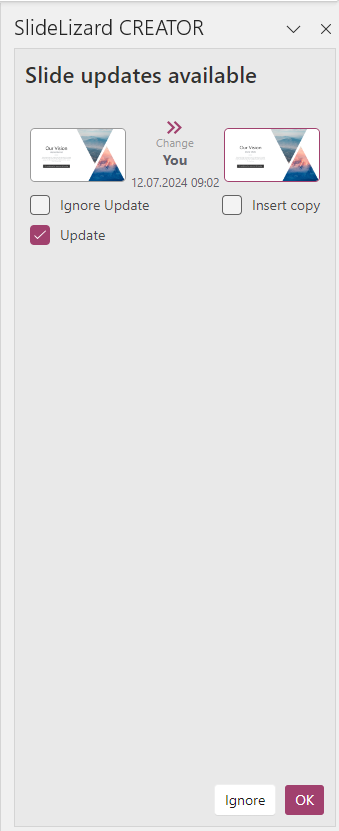
- Igore update
Keep the old setting. - Insert update
Insert it as a copy. - Update
Overwrite the slide.
At the bottom right you can now click “Ignore” or “OK”, depending on your needs.
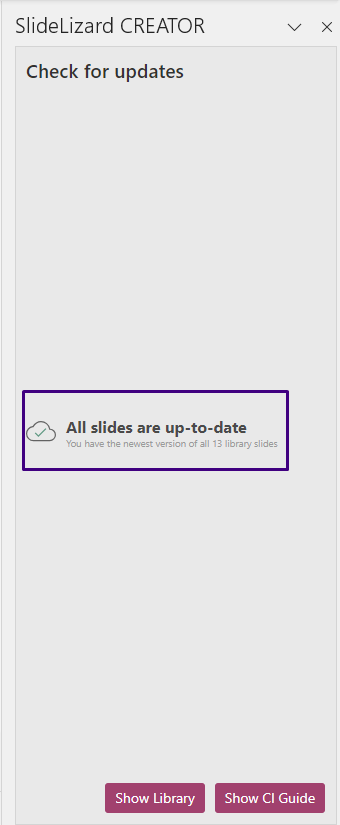
If there are no updates, the following window will appear.
3. Save slides to Library
With this option you can easily synchronize the desired slides with SlideLizard CREATOR.
- Select the slide(s) that you want to synchronize. This can be a single slide, but also several. For helpful shortcuts, see “SHORTCUTS”.
- Click on “Save slides to Library”.
- Save the synchronization. See “FIRST STEPS IN LIBRARY”.